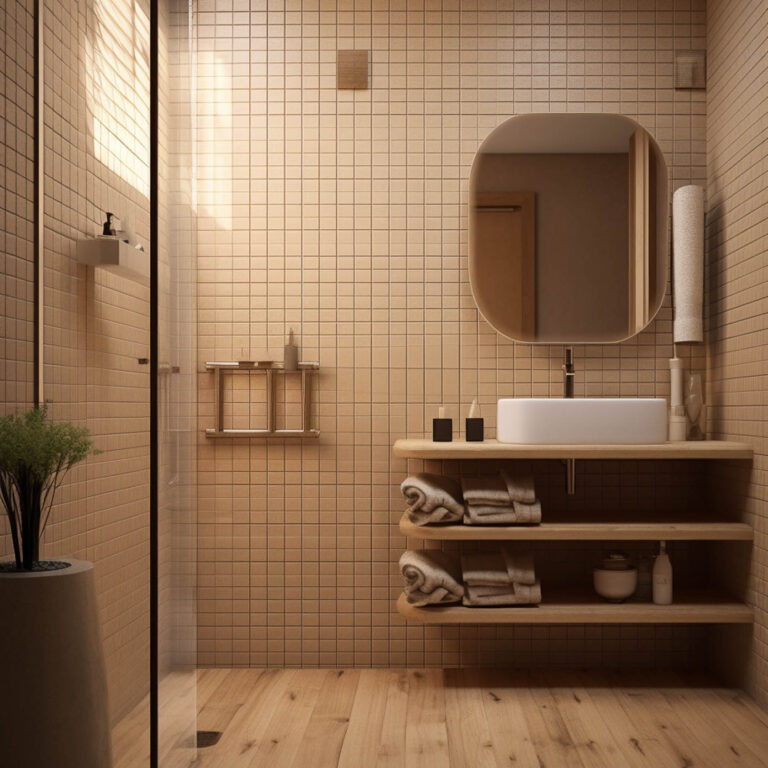
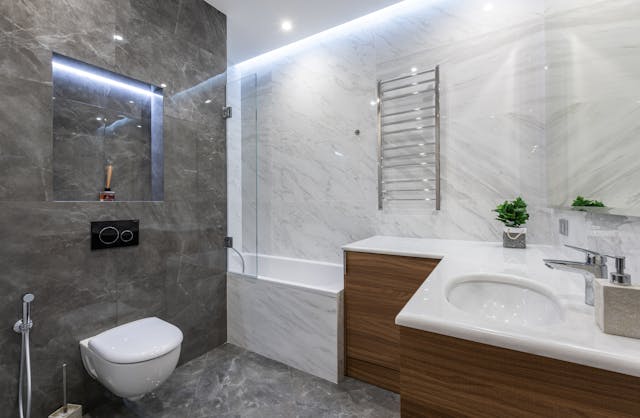
Affordable Bathroom Remodel Sacramento CA: Step-by-Step Renovation Planning Guide

A successful remodel starts with a plan — especially when you’re watching your budget. For Sacramento homeowners, the right preparation can mean the difference between an affordable refresh and unexpected overruns.

This economical bathroom makeover Sacramento guide outlines each phase of remodeling — from budgeting and material selection to scheduling and final inspections — so your project runs smoothly from start to finish.


Step 1: Define Your Goals and Budget

Start by clarifying what you want to achieve. Are you improving function, increasing storage, or updating style?

Set clear priorities:

  1. Must-haves (fixtures, waterproofing, lighting).

  2. Nice-to-haves (tile accents, upgraded hardware).

  3. Optional upgrades (custom cabinetry or heated floors).

Budget tip: Add a 10–15% contingency for unexpected plumbing or repair costs.


Step 2: Measure and Plan the Layout

Accurate measurements are critical. Record wall lengths, ceiling height, plumbing locations, and window dimensions.
Once you have the data, create a simple sketch or digital layout.

Smart Planning Tip: Keep major plumbing fixtures — sink, shower, toilet — in their existing locations. This alone can save thousands in labor.

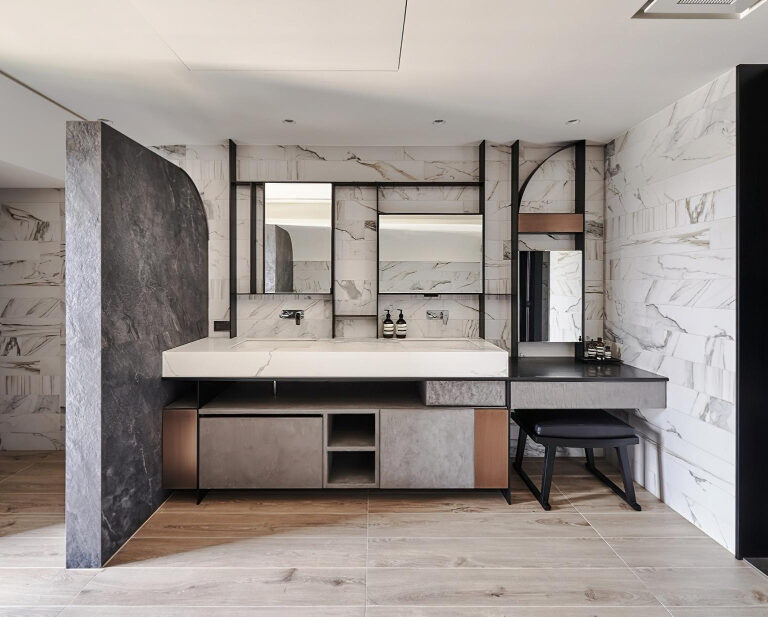
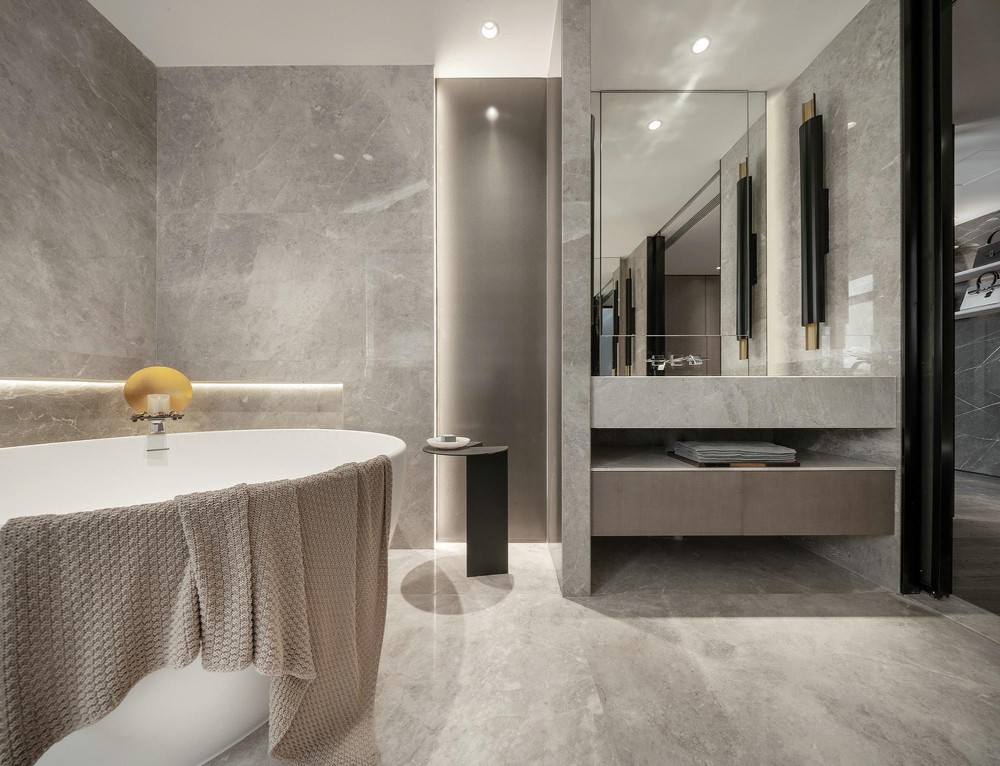
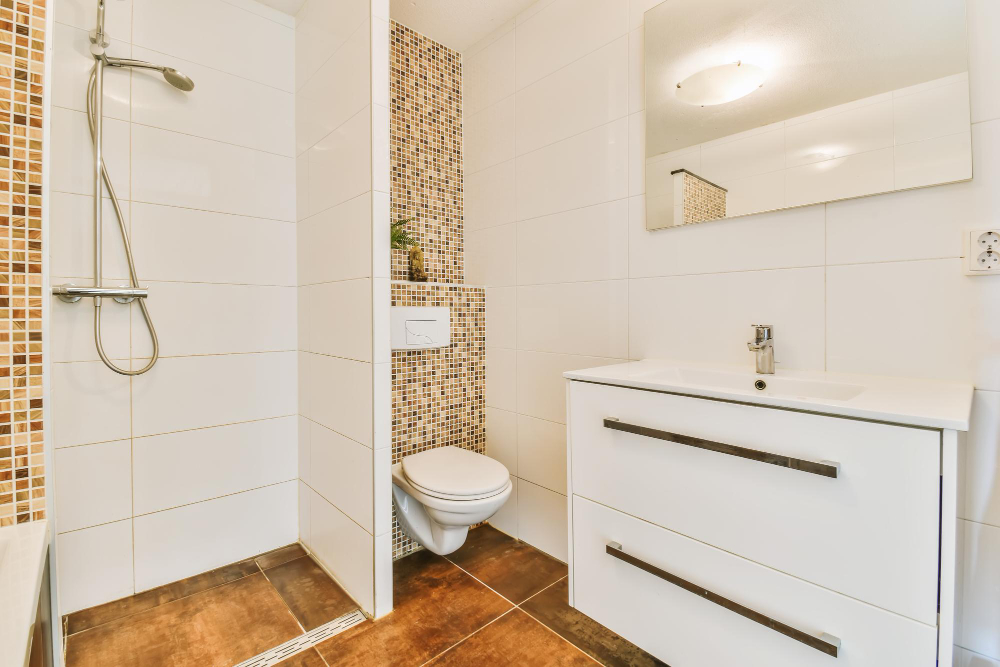
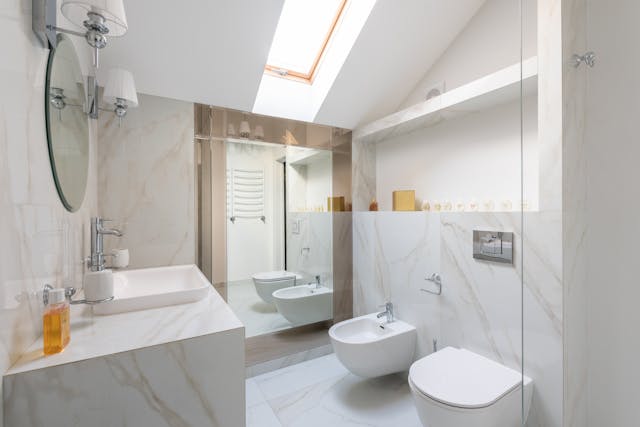
Affordable Bathroom Remodel Sacramento CA

Step 3: Choose the Right Materials

Durability meets design in the modern affordable bathroom. Choose cost-efficient materials that perform well under daily use.

CategoryAffordable OptionPremium Feel
FlooringLuxury vinyl plankMimics hardwood or stone
CountertopsPrefab quartzDurable and easy to maintain
Wall FinishSemi-gloss paintResists moisture and mildew
Shower WallsPorcelain or ceramic tileEasy to clean and timeless

Step 4: Source Materials Locally

Shopping locally reduces shipping costs and gives you a chance to see and feel materials before purchasing. Visit kitchen and bath showrooms near me for side-by-side comparisons of fixtures, vanities, and tiles.
Showrooms often offer package pricing that includes hardware and lighting, which can save 10–20%.


Step 5: Hire Trusted Professionals

Even for smaller remodels, professional expertise prevents expensive mistakes. Look for:

  • Licensed contractors familiar with Sacramento building codes.

  • Verified online reviews or local references.

  • Clear contracts with timelines and scope.

Pro Tip: Ask for itemized bids. It helps you compare true labor and material costs between contractors.


Step 6: Schedule Efficiently

Plan your remodel timeline carefully to minimize disruption.

Typical timeline:

  • Demolition and prep: 1–3 days

  • Plumbing/electrical updates: 2–4 days

  • Tile and flooring installation: 3–5 days

  • Fixtures and paint: 2–3 days

Scheduling trades sequentially — not overlapping — prevents confusion and keeps costs predictable.


Step 7: Inspect and Maintain

Once your bathroom is complete, inspect for:

  • Proper sealing around tile and fixtures.

  • Consistent water pressure and temperature.

  • Smooth caulking and clean grout lines.

Afterward, maintain your bathroom by cleaning regularly and resealing grout annually.


Builder’s Notes

A step-by-step approach ensures your bathroom remodel stays on budget and on schedule. Sacramento homeowners who plan, compare, and hire carefully can achieve high-end results for a fraction of the typical cost.

👉 Remember: a clear plan isn’t just smart — it’s your strongest tool for saving money while getting beautiful results.

Top-Rated Walk-In Shower Designs: Real Home Transformations That Inspire

A walk-in shower can transform your bathroom into a modern, open, and practical retreat — but creating one that fits your space, budget, and style takes smart planning. Whether you’re doing a light refresh or a complete overhaul, this modern walk-in shower concept guide walks you through each stage of the process.


Step 1: Assess Your Bathroom Layout

Before selecting finishes or fixtures, measure your space carefully. Consider:

  • Existing plumbing locations

  • Wall structure and window placement

  • Drain slope and subfloor condition

If your bathroom already has a tub, replacing it with a walk-in shower is often the most efficient conversion.


Step 2: Choose Your Design Style

Walk-in showers come in a variety of layouts and materials.

Design TypeDescriptionIdeal For
Corner EnclosureCompact glass or tile unitsSmall bathrooms
Alcove LayoutReplaces tubs easilyTraditional remodels
Open “Wet Room” StyleNo doors or thresholdsModern, spacious layouts
Curbless EntryBarrier-free accessUniversal design

Modern bathrooms often combine neutral color palettes with bold accents like matte black fixtures or textured tile.

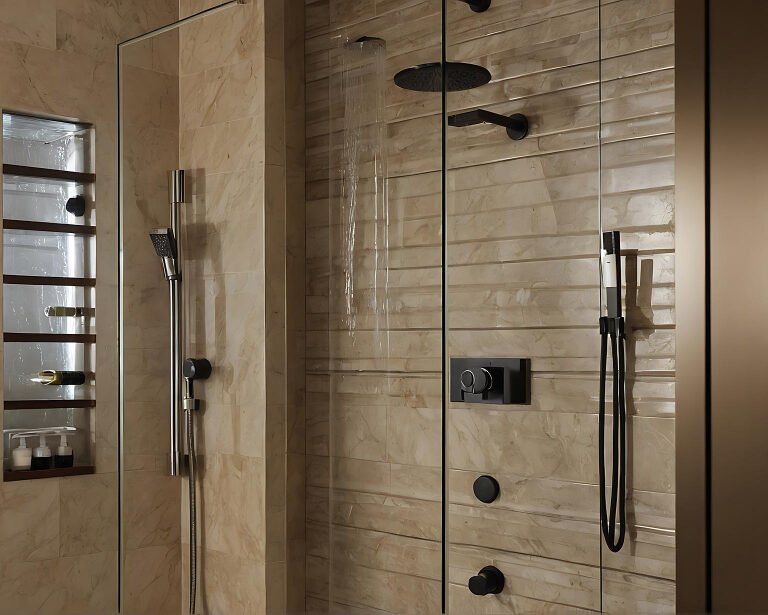
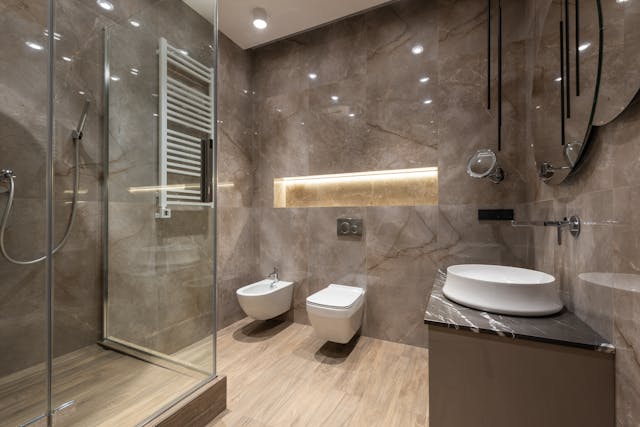
Top-Rated Walk-In Shower Designs

Step 3: Pick the Right Materials

Durability and maintenance are key. Focus on:

  • Tile: Porcelain or ceramic for longevity and style variety

  • Glass: Frameless for a clean, open feel

  • Fixtures: Stainless steel or brushed nickel for corrosion resistance

  • Flooring: Slip-resistant tile or textured stone

These materials provide a balance of safety, function, and aesthetics — all central to modern remodeling standards.


Step 4: Understand the Cost Breakdown

Your total investment depends on size, material, and labor.

Project ScopeAverage Cost
Basic Remodel (Tile + Glass)$7,000–$10,000
Mid-Range (Custom Tile, Built-in Niche)$11,000–$15,000
Luxury (Natural Stone, Lighting, Seating)$16,000–$25,000+

If replacing an old enclosure, factor in your shower replacement cost, which varies by region and plumbing complexity.


Step 5: Plan for Functionality

A walk-in shower should feel beautiful and effortless to use. Include:

  • A recessed niche or corner shelf

  • Bench seating or a floating slab

  • Dual showerheads or rainfall fixtures

  • Adequate lighting for mood and visibility

Even small upgrades, like linear drains or heated floors, can enhance comfort and value.


Step 6: Hire Professionals for Installation

While some DIY enthusiasts tackle tile work, most homeowners benefit from hiring a licensed remodeler. A professional ensures:

  • Proper waterproofing and drainage

  • Accurate slope for curbless entries

  • Code compliance and safety assurance

Look for contractors experienced with modern bathrooms — especially those skilled in tile alignment and precision detailing.


Step 7: Inspect and Maintain

Once complete, seal grout lines and wipe down glass regularly to preserve that just-finished look. Annual inspections help catch minor issues before they become costly repairs.


Homeowner’s Checklist

✔ Measure and evaluate your space
✔ Choose your design and materials
✔ Get quotes and finalize your budget
✔ Schedule licensed installation
✔ Maintain your new shower for lasting value


Builder’s Notes

A walk-in shower is one of the smartest upgrades you can make — balancing everyday function with lasting beauty. With a clear plan and professional installation, your remodel can deliver luxury, accessibility, and value in every square foot.

👉 Start with design inspiration, material samples, and a detailed consultation to turn your vision into a custom shower that’s built to last.

Cement Siding vs. the Rest: Which Exterior Material Holds Up Best?

When it comes to choosing the right exterior home materials, homeowners are met with an array of options—each promising durability, beauty, and ease of maintenance. But not all siding materials are created equal. And when you’re investing in your home’s long-term curb appeal and protection, the stakes are high.

In this article, we examine how cement siding (specifically fiber cement) compares to the most common competitors—vinyl, wood, stucco, and engineered wood—across five key categories: durability, maintenance, aesthetics, cost, and value retention.

If you’re asking, “Which siding will actually hold up best?”, this is the authoritative breakdown you’ve been looking for.


1. Durability: Weathering Time, Literally

Fiber Cement Siding (Cement Siding)
✔ Extremely resistant to moisture, fire, pests, and UV rays
✔ Performs exceptionally in varied climates — from wet to dry, hot to freezing
✔ Typically rated for 30–50+ years with proper installation

Vinyl Siding
➖ Resists rot and insect damage but is prone to cracking or warping under impact or extreme temperatures
➖ Shorter lifespan: ~20–30 years, often with visible wear

Wood Siding
➖ Naturally beautiful, but vulnerable to termites, rot, and swelling/shrinking due to moisture
➖ Requires sealing and repainting to stay functional

Stucco
✔ Excellent thermal resistance and can last 50+ years in dry climates
➖ In wet or freeze-thaw regions, it can crack and deteriorate

Engineered Wood
✔ Stronger than traditional wood, with treatments for moisture and pests
➖ Lifespan around 20–30 years; surface can deteriorate if not maintained

Winner:Cement siding stands out for resilience in nearly all climates and superior longevity.


2. Maintenance: What It Takes to Keep It Beautiful

Fiber Cement Siding
✔ Low maintenance: occasional washing and repainting every 10–15 years
✔ Resists warping and fading far better than other painted options

Vinyl Siding
✔ Very low maintenance, no painting needed
➖ However, color cannot be changed and repairs may involve full panel replacement

Wood Siding
➖ High maintenance: regular painting/staining and inspection for rot or insects
➖ Maintenance costs add up over time

Stucco
✔ Requires minimal upkeep when installed correctly
➖ Susceptible to cracks; patching often requires color-matching and re-blending

Engineered Wood
➖ Moderate maintenance: needs repainting and inspection to maintain integrity
✔ Some newer products offer longer finish warranties

Winner:Vinyl wins for lowest day-to-day maintenance, but cement siding offers long-term ease without design compromise.

cement siding

3. Aesthetics: Style and Substance

Fiber Cement Siding
✔ Offers refined, architectural appeal
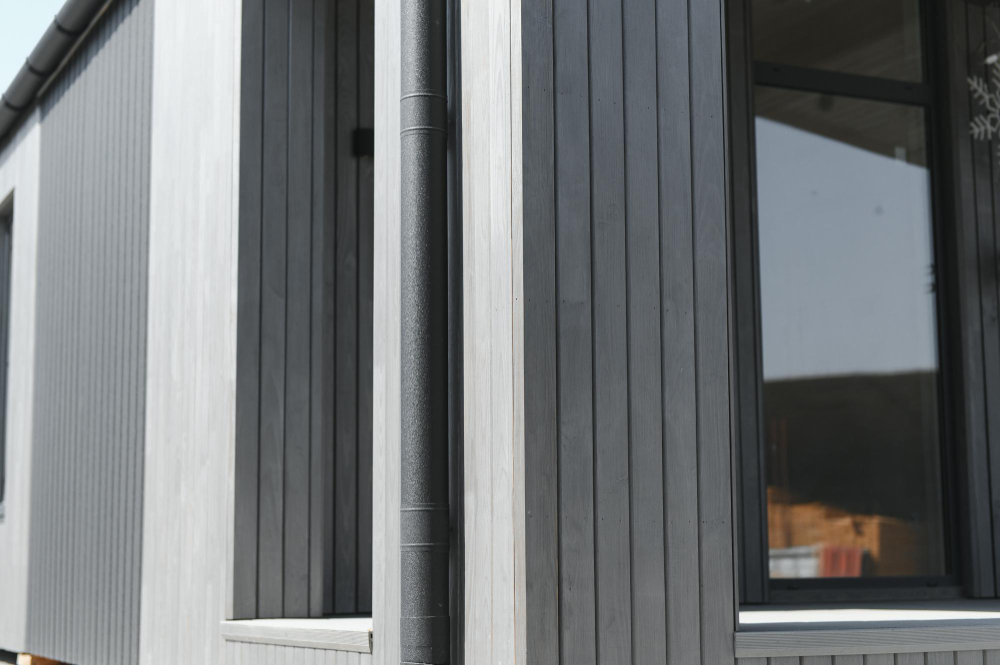
✔ Can mimic wood grain, board and batten, or smooth contemporary finishes
✔ Paintable in any color — highly customizable

Vinyl Siding
➖ Limited in visual depth and texture
➖ Many color options but lacks the high-end aesthetic of fiber cement or wood

Wood Siding
✔ Unmatched natural beauty and texture
➖ Over time, weathering can either add character or require restoration

Stucco
✔ Clean, modern, or Mediterranean appeal
✔ Texture and pigment options, but not as versatile as cement or wood

Engineered Wood
✔ Attractive and warm, mimicking traditional wood
➖ Less customizable than cement siding in finish and format

Winner:Cement siding delivers beauty, variety, and longevity — a designer’s top pick for upscale curb appeal.


4. Cost: Upfront and Long-Term

Fiber Cement Siding
💰 Mid-to-high initial cost
✔ Excellent return on investment (~70–85% ROI in resale value)
✔ Lower cost over time due to durability and fewer repairs

Vinyl Siding
💰 Most affordable option upfront
➖ Lower resale ROI and shorter lifespan
➖ Aesthetics may limit value in high-end neighborhoods

Wood Siding
💰 High initial and maintenance costs
➖ Maintenance adds long-term expense
✔ May appeal in specific markets for its character

Stucco
💰 Comparable to fiber cement in cost, but climate-dependent
➖ Repairs can be labor-intensive

Engineered Wood
💰 Generally more affordable than fiber cement
➖ Requires consistent upkeep to avoid degradation

Winner:Cement siding balances cost, performance, and resale value — ideal for homeowners seeking long-term benefit.


5. Value Retention: What It Means for Your Investment

Fiber Cement Siding
✔ Ranked as one of the top remodeling investments by cost-vs-value reports
✔ Boosts curb appeal and attracts buyers with its longevity and low upkeep

Vinyl Siding
➖ ROI varies by market and home value tier
➖ Often seen as a budget choice

Wood Siding
➖ Can add charm, but maintenance concerns may reduce buyer appeal

Stucco
✔ Marketable in appropriate climates
➖ In wetter regions, may be seen as a maintenance risk

Engineered Wood
✔ Middle-of-the-road in perceived value
➖ Depends heavily on brand and finish longevity

Winner:Cement siding consistently ranks as one of the highest-value exterior upgrades.


Final Verdict: Cement Siding Earns Its Place at the Top

MaterialDurabilityMaintenanceAesthetic AppealCost EfficiencyValue Retention
Fiber Cement✅ High✅ Low✅ High✅ Balanced✅ Excellent
Vinyl➖ Moderate✅ Lowest➖ Basic✅ Low➖ Limited
Wood➖ Low➖ High✅ High➖ Expensive➖ Niche Appeal
Stucco✅ Variable➖ Moderate✅ Moderate➖ Climate-based➖ Regional
Engineered Wood➖ Moderate➖ Moderate✅ Moderate✅ Competitive➖ Variable

If your goal is a refined, long-lasting exterior that blends architectural appeal with proven performance, cement siding leads the pack. It’s a smart choice for homeowners who want a beautiful facade today — and peace of mind for decades to come.

Bathroom Showrooms Sacramento: Style, Selection, and Service Compared

When embarking on a bathroom renovation, the choice of showroom often defines the outcome of your project. In Sacramento—a city where historic charm meets contemporary living—homeowners are presented with numerous options for sourcing fixtures, finishes, and full-service bath design support. Yet not all bathroom showrooms in Sacramento are created equal.

In this formal comparative guide, we evaluate local showrooms based on three essential criteria: style, selection, and service. Whether you’re creating a minimalist spa retreat or a timeless, traditional space, this article will help you identify the ideal partner for your remodel.


🧑‍🎨 1. Style: Design Vision and Aesthetic Range

A great showroom offers more than products—it delivers inspiration. From curated vignettes to design-forward layouts, style presentation reflects the level of creative leadership behind the scenes.

What to Look For:

  • Cohesive bathroom displays (not just product walls)

  • Full bath concepts showing material coordination

  • On-trend and classic styles presented with clarity

Key Differentiators Across Sacramento:

  • Some showrooms emphasize modern European minimalism, showcasing floating vanities, integrated lighting, and sleek matte finishes.

  • Others lean toward traditional elegance, featuring clawfoot tubs, ornate mirrors, and rich wood tones.

  • A few offer transitional or eclectic displays, providing flexibility for clients with blended tastes.

Evaluation Tip:
If the showroom reflects your aesthetic sensibility from the moment you walk in, it’s likely to align well with your project goals.


🛍️ 2. Selection: Brands, Materials, and Availability

A visually impressive showroom means little if the products are out of reach. Selection involves the range of brands, materials, customization options, and stock availability—a major factor in remodeling timelines.

High-Value Indicators:

  • Access to premium brands (e.g., Kohler, Duravit, Hansgrohe, Robern)

  • A variety of finish options for hardware and fixtures

  • Customizable cabinetry and countertops

  • Availability of eco-conscious and water-saving solutions

Sacramento Market Insights:

  • Several larger showrooms boast deep brand partnerships, offering exclusive lines or finish options not found in retail stores.

  • Boutique design studios may carry fewer brands but excel in offering tailored solutions and artisan products.

  • Lead times can vary significantly depending on supply chain dynamics; always inquire about stock vs. special order timelines.

bathroom showrooms Sacramento

🤝 3. Service: Consultation, Expertise, and Project Support

Service is often the deciding factor in whether a remodel runs smoothly or becomes a costly, time-consuming challenge. Exceptional showrooms offer more than transactions—they provide design consultation, technical insight, and long-term support.

Key Service Features to Compare:

  • Complimentary or paid design consultations

  • Knowledgeable staff with interior design or architectural backgrounds

  • Transparent pricing and itemized quotes

  • Coordination with contractors and installers

  • Post-sale support (e.g., warranty handling, installation tips)

Local Trends:

  • High-end showrooms in Sacramento increasingly offer full-service experiences, pairing in-house designers with contractor networks to manage projects from planning to installation.

  • Mid-size showrooms may refer you to outside trades but still provide comprehensive guidance and product education.

  • Some large retail-based showrooms lean toward a self-service model, offering competitive pricing but limited personalized assistance.


📊 Summary Comparison Table

Showroom TypeStyle RangeProduct SelectionService LevelBest For
High-End BoutiqueCurated luxuryExclusive premium brandsFull design servicesCustom luxury projects
Mid-Tier Full-LineTransitional mixWide selection, good stockGuided consultationsBalanced budgets with design support
Large Retail ShowroomStandard modern/traditionalValue-focused, in-stock itemsLimited design supportDIYers or fast-turn projects

🧠 Final Thoughts: Choosing the Right Showroom for Your Project

When selecting among bathroom showrooms in Sacramento, the ideal choice depends on your project’s complexity, budget, and design goals. Style should speak to your vision, selection should support your function, and service should simplify your journey.

Investing time in comparing showrooms—visiting them in person, speaking with consultants, and asking the right questions—can lead to a smoother renovation and a bathroom that not only looks exceptional, but also performs with lasting quality.

Because in great design, what’s behind the walls matters as much as what’s in front of them.

ADU Construction Explained: A Step-by-Step Guide for Homeowners

For California homeowners looking to maximize property value and living space, ADU Construction has become a popular solution. Whether you’re interested in rental income, a home office, or private space for family, an Accessory Dwelling Unit (ADU) offers flexibility and long-term financial benefits. But many homeowners hesitate because the construction process seems complex. This step-by-step guide breaks it down so you can move forward with confidence.

Step 1: Understand Local Regulations

Before hiring contractors or sketching designs, check your city or county guidelines. California has streamlined ADU approval, but zoning restrictions, height limits, and parking requirements still vary. Knowing what’s allowed in your area prevents costly redesigns and delays later.

Step 2: Define Your Purpose

Is your ADU meant for rental income, multigenerational living, or as a home office? Your intended use will shape design choices, size, and layout. A rental unit may require a full kitchen and separate entrance, while a family suite could prioritize open spaces and accessibility.

Step 3: Set a Realistic Budget

Budgeting upfront helps avoid financial surprises. Consider design fees, permits, labor, and finishes. Many homeowners search for cheap adu options to save money. While affordability matters, balance is key — choose cost-effective solutions without sacrificing durability. A budget-conscious ADU should deliver long-term value.

ADU Construction

Step 4: Choose a Design and Layout

Keep your layout simple to control costs. A one-bedroom or studio ADU can serve most needs without excessive square footage. Straightforward shapes, such as rectangles, are easier and less expensive to build. Efficient floor plans make compact units feel open and functional.

Step 5: Select Materials Wisely

Affordable doesn’t mean cutting corners. Vinyl plank flooring, quartz-look laminate countertops, and stock cabinetry can provide style at a fraction of the cost of premium materials. Durable, low-maintenance finishes reduce long-term expenses while keeping the look modern.

Step 6: Hire the Right Contractor

An experienced ADU contractor ensures compliance with regulations, manages subcontractors, and helps avoid mistakes that drive up costs. Always review references, licenses, and previous ADU projects before signing an agreement. The right builder can save you money and stress.

Step 7: Manage the Construction Process

Stay engaged throughout construction. Regular site visits and clear communication with your contractor will help prevent delays, ensure quality, and keep the project within budget. Document changes and track expenses carefully to avoid scope creep.

Step 8: Plan for Utilities and Systems

Don’t overlook infrastructure. Water, sewer, and electrical connections must meet code. Discuss whether your ADU will connect to existing systems or require separate lines. Efficient HVAC systems and insulation can also reduce long-term energy costs.

Step 9: Add Final Touches

Once construction is complete, it’s time for finishing details. Landscaping, paint, and storage solutions enhance livability. Even small design choices, like light fixtures or built-in shelving, can make an ADU feel more inviting and functional.

Step 10: Enjoy the Benefits

With careful planning and execution, your new ADU can provide rental income, accommodate family, or create a versatile space that adapts as your needs change. Over time, well-built ADUs pay for themselves while increasing overall property value.

Final Thoughts

ADU Construction may seem intimidating, but with the right steps and careful decisions, it becomes a manageable process. From setting a budget to selecting materials and working with trusted professionals, you can create a cost-effective unit that provides both immediate and long-term rewards.

If you’re ready to add value and versatility to your property, now is the perfect time to explore your ADU options.

Costco Jacuzzi Bath Remodel Cost vs. Custom Remodel: A Design Comparison

When planning a bathroom remodel, one of the most frequent questions homeowners face is simple but significant: “Should I go with a packaged solution or a fully custom design?” With many turning to big-box retailers for convenience and value, Costco’s Jacuzzi bath remodel program has become a popular consideration. But how does the Costco Jacuzzi bath remodel cost compare to a traditional custom remodel — and what are you really getting for your money?

Below is a formal, side-by-side design and value comparison to help guide your decision, ensuring you invest wisely in one of your home’s most personal and functional spaces.


🧾 1. Cost Overview: What You Can Expect to Pay

Costco Jacuzzi Bath Remodel Cost
The program typically offers all-inclusive bath remodel packages starting around $9,000–$15,000, depending on the scope and materials selected. This includes demolition, basic plumbing updates, installation of Jacuzzi fixtures (such as soaking tubs or walk-in showers), and finishes like wall panels and doors. Because it’s a bundled service, pricing is generally predictable and up-front.

Custom Remodel Cost
A fully custom remodel can vary widely in cost, typically ranging between $18,000–$40,000 or more in the Sacramento region, depending on materials, layout changes, and contractor rates. Design fees, specialty labor, structural changes, and premium finishes will all add to the final total.

Cost Advantage: Costco offers a more budget-controlled entry point, ideal for homeowners looking for function and speed over full customization.


🎨 2. Design Flexibility and Personalization

Costco Remodel
The Jacuzzi program through Costco offers a curated menu of design options. This ensures a streamlined process and faster turnaround, but it also means limited choice when it comes to tile, layout, cabinetry, and unique fixtures. Finishes are high-quality, but standardized.

Custom Remodel
Going custom means every detail — from the tile color to the size of your vanity to the placement of your lighting — can be tailored to your taste and space. You’re working with designers, not just installers, and that results in a bathroom that reflects your personal aesthetic and functional needs.

Design Winner: Custom Remodel — best for those seeking a truly individualized space.

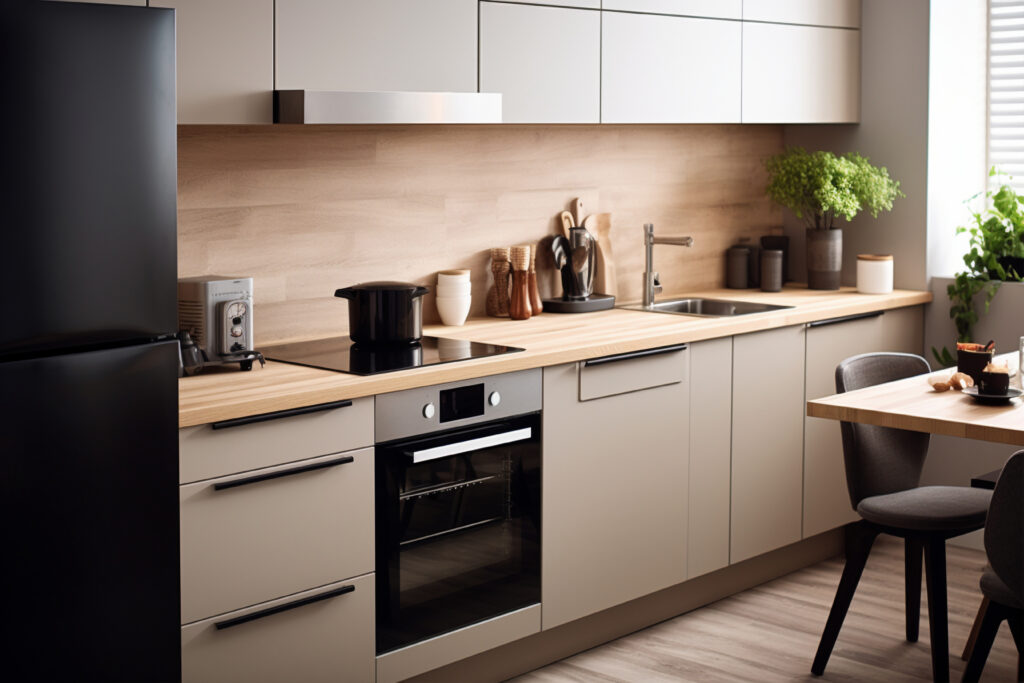
costco jacuzzi bath remodel cost

🛁 3. Product Quality and Material Options

Costco Program
The remodels feature Jacuzzi® brand products, known for quality in bathtubs, walk-in tubs, and accessible shower systems. Materials are durable, easy to clean, and designed for performance — but the selection is largely focused on acrylic and composite materials.

Custom Remodel
A custom route opens the door to natural stone, porcelain, designer tile, floating vanities, underfloor heating, and architectural lighting — all of which elevate the experience and overall property value. However, quality varies greatly depending on who you hire and where materials are sourced.

Material Range: Custom Remodel offers broader (and often higher-end) product options.


⏳ 4. Timeline and Installation Speed

Costco Remodel
Because the program uses a pre-selected range of materials and certified installers, projects typically move faster. Some installations can be completed in as little as one week, especially for straightforward tub-to-shower conversions.

Custom Remodel
Custom projects may require 4–8 weeks or more, depending on availability of materials, contractor timelines, inspections, and design iterations. The planning phase alone may take several weeks.

Speed Advantage: Costco Remodel is ideal for time-sensitive projects or secondary bathrooms.


🧠 5. Warranty and Support

Costco Remodel
The program includes limited product warranties and installation guarantees, with Costco backing the service via its vendor partnership. This can give homeowners peace of mind, especially for basic remodels.

Custom Remodel
Warranties vary by contractor and product. While many pros offer 1-year labor warranties and longer manufacturer coverage, you’re responsible for vetting and coordinating multiple parties.

Warranty Reliability: Costco Remodel offers consistent post-installation support under one roof.


🏠 6. Impact on Home Value

Costco Remodel
Efficient upgrades, especially in guest bathrooms or aging-in-place scenarios, can enhance daily living and boost resale appeal — particularly when done cleanly and with reputable brands.

Custom Remodel
For primary bathrooms or luxury listings, a custom design can significantly increase perceived value and attract higher offers. Buyers often pay more for distinct, high-quality finishes and layout upgrades.

Resale Value Winner: Custom Remodel, particularly when aligned with the home’s overall style and market expectations.


🧾 Final Thoughts: Which Remodel Is Right for You?

Choosing between a Costco Jacuzzi bath remodel and a custom remodel ultimately comes down to priorities.

  • Choose Costco if you want a fast, functional, and cost-efficient upgrade with reliable results and minimal decision-making.

  • Choose a custom remodel if you’re designing your forever bathroom, want total creative control, or are upgrading for long-term value and luxury.

Both paths offer smart solutions — and neither is wrong. The key is aligning your remodel with your budget, timeline, and lifestyle needs.

Two Sacramento Bath Remodels, Two Very Different Results—Which One Got It Right?

In a quiet cul-de-sac, two couples on the same street began a similar journey: a complete bath remodel Sacramento. They had similar budgets, square footage, and even started their projects within weeks of each other.

But where their stories ended? Night and day.

As designer Nate Berkus often says, “Your home should tell the story of who you are, and be a collection of what you love.” Both remodels had potential. Only one told the right story.


🏠 The Two Homes

House A:
Sophia and Marcus, mid-30s, newlyweds. They wanted elegance on a modest budget. Their 1985 master bath felt more like a closet than a retreat.

House B:
Karen and Glenn, empty nesters. Their 1990s bathroom had builder-grade everything, and they were ready for their forever upgrade.

Both had $40,000 to work with.


🛠️ Design Philosophy: Trends vs. Timeless

Sophia & Marcus (House A)
Chose matte black everything, trending geometric tile, and a floating vanity. It looked incredible—on Instagram. But six months in, the grout was hard to clean, the black fixtures showed every water spot, and the style already felt less fresh.

Karen & Glenn (House B)
Opted for Carrara-look porcelain, antique brass hardware, and an arched mirror. The space felt warm, curated, and connected to the rest of their transitional-style home.

🗝️ Lesson from Nate: Style should complement your home’s narrative, not just echo a trend.

Two Sacramento Bath Remodels, Two Very Different Results—Which One Got It Right?

💡 Functionality: Looks vs. Livability

House A
The open shower concept looked high-end but caused water to splash onto the vanity and required frequent floor mopping. The LED-lit mirror they loved online had no dimmer—bright at 2 a.m. was… not ideal.

House B
They focused on function first:

  • Built-in linen cabinet

  • Lighting on dimmer switches

  • A curbless shower with a glass door for warmth and containment

Every element supported how they actually lived, not just how they wanted the space to feel.


🧱 Materials: Showpieces vs. Substance

Sophia & Marcus splurged on a single slab of exotic quartzite for the vanity but cut corners on plumbing and waterproofing.

Karen & Glenn skipped the wow-factor stone but upgraded:

  • Subfloor for heated tile

  • Quiet, efficient ventilation

  • High-quality fixtures with lifetime warranties

The difference? Long-term performance. One space needed repairs in under a year. The other? Aging gracefully.


📊 Outcome: Aesthetics, Function, and Value

CategoryHouse AHouse B
Initial ImpactHigh design, trend-forwardUnderstated but refined
FunctionalitySeveral daily frustrationsSeamless, comfortable experience
Resale ValueAppraiser flagged plumbing shortcutsAppraised +$18,000 post-remodel
Emotional Feel“Cool, but we’d do it differently now”“This space finally feels like ours”

✅ Final Thought

A bath remodel in Sacramento isn’t just a before-and-after moment. It’s a decision that shapes how you begin and end your day—every day.

Both remodels had beauty. But only one had balance: of personal taste, practical design, and emotional connection.

Nate Berkus reminds us: “Your space should reflect your journey, not someone else’s highlight reel.” Whether you’re designing with bold confidence or quiet intention, make choices that feel like home—not just for now, but for the years to come.


🧰 CALL TO ACTION

Planning your own bath remodel in Sacramento?
Let our design-build team help you create something personal, purposeful, and built to last—because the best space is the one that tells your story.

DreamLine Lioher Cabinets: A Data-Driven Look at Modern Beauty and Practical Design

In today’s world of interior design, functionality is just as important as beauty. And when it comes to combining clean lines, innovative storage solutions, and design-forward finishes, DreamLine Lioher cabinets are setting a new standard. Blending Spanish-crafted quality with modern minimalism, they represent a movement toward smarter, sleeker living.

This guide explores the performance, design value, and inspiration behind Lioher cabinetry—using both data and a bit of emotion to show why they might be the next best thing for your kitchen or bathroom renovation.


The Design Aesthetic: Sleek. Seamless. Sophisticated.

DreamLine Lioher cabinets are known for:

  • Flat-panel fronts with integrated handles

  • Super matte finishes that resist fingerprints

  • Light-reflecting gloss laminates that elevate smaller spaces

With a wide palette of neutral and bold options, they effortlessly support both warm organic spaces and minimalist European-inspired interiors.

Genevieve Gorder Inspiration: Lioher gives you the canvas—you paint the mood. Use wood grains for grounded elegance or soft matte greys for a futuristic calm.

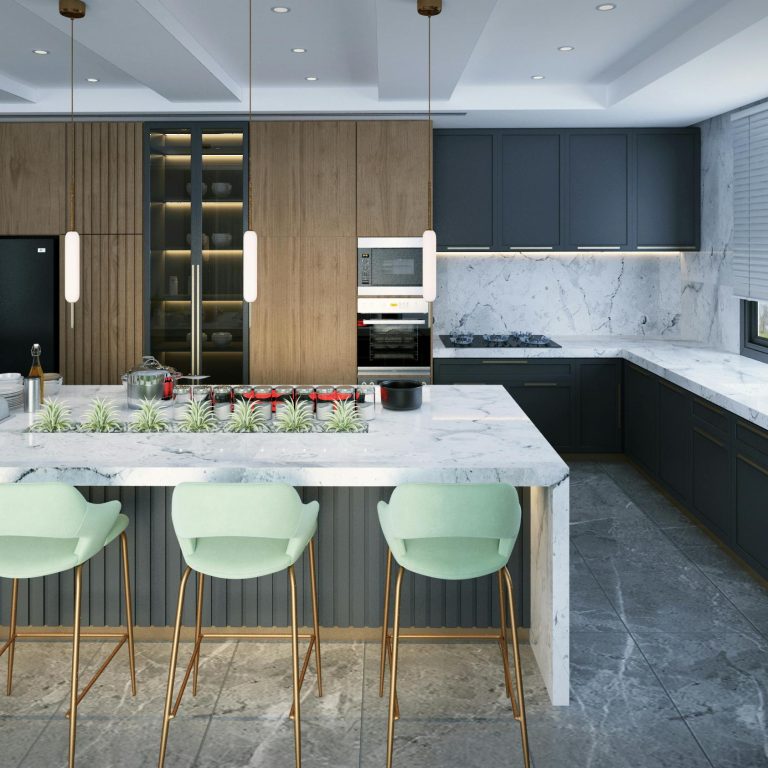
Top 5 Kitchen Remodeling Trends for a Modern Look

Performance Backed by Technology

Here’s where Lioher stands out in hard numbers:

  • Scratch Resistance: Rated 4.5/5 for surface durability (based on 2023 IFA surface impact testing)

  • Moisture Resistance: Surfaces show <5% swelling after 24-hour exposure (ideal for kitchens & bathrooms)

  • UV Stability: Rated to maintain color in both high-sun and artificial light conditions for 10+ years

Translation? These cabinets are not just beautiful—they’re built for real life.


Sustainable Manufacturing Process

Lioher’s commitment to eco-friendly materials includes:

  • CARB2-compliant panels (low formaldehyde emissions)

  • 100% recyclable components

  • Water-based finishes where applicable

Why It Matters: For homeowners prioritizing both design and responsibility, DreamLine Lioher offers style without compromise.


Versatile Applications

While Lioher is often seen in kitchens, it performs just as well in:

  • Bathroom vanities

  • Laundry rooms

  • Home offices

  • Closets and mudrooms

Design Tip: Use matte white Lioher in high-traffic utility spaces for a clean, contemporary look that hides fingerprints and enhances light.


Cost and Value Considerations

While pricing can vary by installer and region, most homeowners find that:

  • Lioher cabinets offer 20-30% savings compared to full custom millwork

  • Lead times are shorter due to pre-fabricated panel systems

  • Long-term durability offsets higher upfront cost compared to low-end stock cabinets

ROI Insight: Kitchens with modern flat-panel cabinetry (like Lioher) see an average resale value increase of 6-10% in urban markets, according to the National Kitchen & Bath Association.


Final Thoughts

DreamLine Lioher cabinets are more than a design choice—they’re a declaration of modern living. With durability, sustainability, and undeniable beauty, they empower you to create spaces that reflect your lifestyle and your values.

Whether you’re renovating for resale or redefining your forever home, let these cabinets be the foundation of your story.

Call to Action

Curious if DreamLine Lioher is right for your project? Our design consultants can walk you through samples, performance data, and layout strategies that bring your vision to life.

Walk-In Shower Remodeling: A Step-by-Step Story of Smart Design and Big Impact

It started with a drip.

Nothing dramatic—just a slow, rhythmic reminder that Sophie and Mark’s bathroom hadn’t been touched since the early 2000s. But what began as a minor leak turned into a full-blown walk-in shower remodel that changed the way they experienced their mornings.

Here’s how they turned a dated, cramped shower stall into a sleek, spa-like retreat, and how you can too—step by step.


Step 1: Identify the Problem (and the Potential)

Sophie and Mark knew they needed a change when they could barely turn around in their fiberglass stall. Cracked tile, old grout, and poor lighting only added to the frustration.

Key Takeaway: Before choosing materials or finishes, define what’s not working. Lack of space? Poor lighting? Water leaks? Start with the real issues.


Step 2: Set a Realistic Budget

They set aside $18,000, with a contingency buffer for surprises (and yes, there were surprises).

Estimated Breakdown:

  • Demolition and prep: $2,000

  • Plumbing updates: $3,000

  • Tile and waterproofing: $5,000

  • Frameless glass enclosure: $3,500

  • Fixtures and finishes: $2,500

  • Labor and contingency: $2,000

Pro Tip: Always budget for the unexpected—a hidden leak behind drywall or outdated plumbing can sneak up on you.

Step 3: Design the Layout with Intention

Sophie wanted a bench. Mark wanted dual showerheads. They both wanted more elbow room.

Their solution:

  • A 60″ x 36″ open walk-in shower

  • Recessed shelving for shampoo and soaps

  • A floating bench with built-in support

  • Rainfall and handheld showerheads for versatility

David’s Design Rule: Make every square foot count. Smart storage and layout upgrades are just as important as style.


Step 4: Choose Materials That Combine Style and Function

They selected:

  • Large-format matte porcelain tiles for the walls

  • Pebble mosaic flooring for added texture and grip

  • Brushed nickel fixtures for timeless appeal

  • Frameless glass to keep the space open and airy

Why it worked: These materials offered durability, low maintenance, and visual impact—without overwhelming the space.


Step 5: Trust the Process

There were delays. A custom glass panel arrived cracked. A plumbing valve needed replacing. But Sophie and Mark stayed patient.

Lesson Learned: Remodeling isn’t perfect—but the end result is worth every minor delay and tough decision.


Final Thoughts

Sophie and Mark’s walk-in shower remodel wasn’t just a fix for a leak. It was a lifestyle upgrade. With thoughtful design, a clear plan, and a willingness to adapt, they created a space that feels like a spa and functions like a dream.

Call to Action

Planning a walk-in shower remodel? Our team is here to help guide you every step of the way—from design to installation, and every beautiful detail in between.

7 Kitchen Plumbing Essentials You Need to Know Right Now

When it comes to kitchen renovations or quick-fix emergencies, plumbing is one area you can’t afford to overlook. A dripping faucet or poorly routed drain can cause more than annoyance—it can derail your remodel or damage your cabinetry. This quick-read, Martha Stewart-inspired guide breaks down the most urgent things you need to know about kitchen plumbing, with elegance and efficiency in mind.


1. Know Where Your Shut-Off Valves Are

Before you touch anything plumbing-related, locate your sink’s hot and cold water shut-off valves. These will save you in an emergency—or when you’re installing that beautiful new faucet.

Pro Tip: Replace old shut-off valves while you’re upgrading fixtures. It’s a small change with big impact.


2. Plan Plumbing First in Any Remodel

Plumbing layout determines where your sink, dishwasher, and refrigerator can go. Want to move your sink to the island? That requires careful planning and rerouting.

Urgency Insight: Making changes after cabinets are installed can cost you extra and delay your entire timeline.

7 Kitchen Plumbing Essentials You Need to Know Right Now

3. Choose the Right Materials for Pipes

PEX, copper, or PVC? Each has its place.

  • PEX: Flexible and great for remodels.

  • Copper: Long-lasting and classic.

  • PVC: Often used for drain lines.

Martha’s Tip: Don’t mix pipe materials without proper fittings—it can cause corrosion or leaks.


4. Always Install an Air Gap (or High Loop) for Dishwashers

An air gap prevents dirty water from backing into your dishwasher.

Why It’s Urgent: It’s required by code in many places, and skipping it can lead to health hazards and inspection fails.


5. Don’t Forget Venting

A drain without proper venting will gurgle, drain slowly, and eventually smell. Every fixture needs a vent—period.

Smart Solution: If traditional venting isn’t an option, consider air admittance valves (AAVs).


6. Consider a Hot Water Recirculation System

Hate waiting for hot water? A recirculation pump can solve that.

Efficiency Boost: Reduces water waste and enhances convenience—especially in large or open-plan kitchens.


7. Hire a Licensed Plumber for Critical Installations

DIY is great for organizing a pantry. Not so much for moving gas lines or drain pipes.

Safety First: A licensed plumber ensures everything is to code—and avoids expensive rework down the line.


Final Thoughts

Whether you’re updating fixtures or planning a full kitchen renovation, understanding your plumbing essentials is critical. Addressing these seven points up front keeps your kitchen functional, beautiful, and safe.

Call to Action

Need expert plumbing advice or help planning your remodel? Contact our licensed professionals for fast, elegant solutions that keep your kitchen flowing smoothly.