

ADU Construction Explained: A Step-by-Step Guide for Homeowners
For California homeowners looking to maximize property value and living space, ADU Construction has become a popular solution. Whether you’re interested in rental income, a home office, or private space for family, an Accessory Dwelling Unit (ADU) offers flexibility and long-term financial benefits. But many homeowners hesitate because the construction process seems complex. This step-by-step guide breaks it down so you can move forward with confidence.
Step 1: Understand Local Regulations
Before hiring contractors or sketching designs, check your city or county guidelines. California has streamlined ADU approval, but zoning restrictions, height limits, and parking requirements still vary. Knowing what’s allowed in your area prevents costly redesigns and delays later.
Step 2: Define Your Purpose
Is your ADU meant for rental income, multigenerational living, or as a home office? Your intended use will shape design choices, size, and layout. A rental unit may require a full kitchen and separate entrance, while a family suite could prioritize open spaces and accessibility.
Step 3: Set a Realistic Budget
Budgeting upfront helps avoid financial surprises. Consider design fees, permits, labor, and finishes. Many homeowners search for cheap adu options to save money. While affordability matters, balance is key — choose cost-effective solutions without sacrificing durability. A budget-conscious ADU should deliver long-term value.
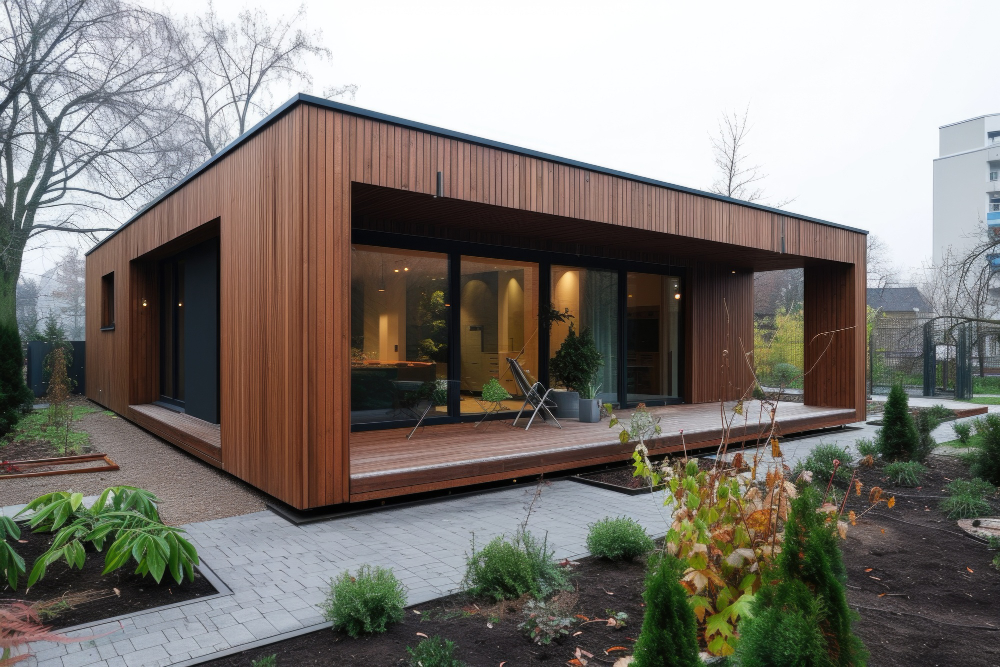
Step 4: Choose a Design and Layout
Keep your layout simple to control costs. A one-bedroom or studio ADU can serve most needs without excessive square footage. Straightforward shapes, such as rectangles, are easier and less expensive to build. Efficient floor plans make compact units feel open and functional.
Step 5: Select Materials Wisely
Affordable doesn’t mean cutting corners. Vinyl plank flooring, quartz-look laminate countertops, and stock cabinetry can provide style at a fraction of the cost of premium materials. Durable, low-maintenance finishes reduce long-term expenses while keeping the look modern.
Step 6: Hire the Right Contractor
An experienced ADU contractor ensures compliance with regulations, manages subcontractors, and helps avoid mistakes that drive up costs. Always review references, licenses, and previous ADU projects before signing an agreement. The right builder can save you money and stress.
Step 7: Manage the Construction Process
Stay engaged throughout construction. Regular site visits and clear communication with your contractor will help prevent delays, ensure quality, and keep the project within budget. Document changes and track expenses carefully to avoid scope creep.
Step 8: Plan for Utilities and Systems
Don’t overlook infrastructure. Water, sewer, and electrical connections must meet code. Discuss whether your ADU will connect to existing systems or require separate lines. Efficient HVAC systems and insulation can also reduce long-term energy costs.
Step 9: Add Final Touches
Once construction is complete, it’s time for finishing details. Landscaping, paint, and storage solutions enhance livability. Even small design choices, like light fixtures or built-in shelving, can make an ADU feel more inviting and functional.
Step 10: Enjoy the Benefits
With careful planning and execution, your new ADU can provide rental income, accommodate family, or create a versatile space that adapts as your needs change. Over time, well-built ADUs pay for themselves while increasing overall property value.
Final Thoughts
ADU Construction may seem intimidating, but with the right steps and careful decisions, it becomes a manageable process. From setting a budget to selecting materials and working with trusted professionals, you can create a cost-effective unit that provides both immediate and long-term rewards.
If you’re ready to add value and versatility to your property, now is the perfect time to explore your ADU options.